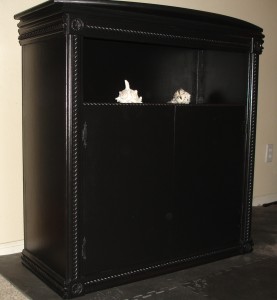
I mentioned last post that my father and I built a new aquarium stand. We built it over the last two weeks in December, 2009. I’m really pleased with the result, so I want to share how we did it.
Requirements
I had three main requirements.
- It has to support a 600-700 lb. aquarium
- It needs to have an enclosed cabinet that can hold a standard 20 gallon aquarium (the sump)
- Must have enough clearance for my existing 18 inch tall protein skimmer, plus some clearance to take the collection cap off conveniently
Mrs. Salty Geek had a couple of requirements of her own.
- Must not be ugly
- Can’t involve cinder blocks
- Must have a spot to display knickknacks, like shells
- Can’t have even one cinder block
- Must be painted black to match the aquarium’s trim
- Forget it, Glen! No cinder blocks!
Design
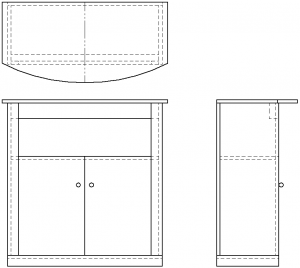
I spent a few days ahead of time designing the aquarium stand in a CAD program. This helped a lot! When we started cutting and assembling, there were very few surprises. Everything fit the first time, except for the cabinet doors – I hadn’t guessed right on the clearance required.
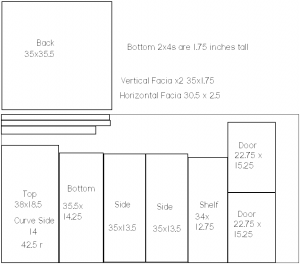
The overall dimensions are 38 inches wide, by 38¼ inches high, by 18½ inches deep at the apex of the bow front’s arc. The cabinet part is 35¾ inches wide, by 14¼ inches deep. I mapped out the the cut plans to show how to cut the plywood pieces out of the 4×8 sheets.
You can download the full plans, including dimensions and the cut plans, in DXF format here.
Materials
We made the main cabinet of ¾ inch Birch hardwood plywood. We choose hardwood plywood so that it would have a nice finish, and so that we could do some routing on the counter top part. If you want to save some money, standard softwood plywood would be fine. Just make sure you use Grade-A plywood, so you get as few defects as possible. This project requires 2 4×8 sheets of plywood, although you use less than half of the second sheet.
The footing and bracing under the counter top is a standard 2×4. I got one 12 foot pine 2×4, and that was exactly enough.
We used ¾ inch by 1 inch scrap wood of varying lengths as batons. I think we used about 10 feet worth of these scraps.
Other materials:
- Carpenter’s glue
- Wood screws. Lots
- Optional: Add molding to suit
- Optional: Finishing nails to fasten the molding on
- Wood putty
- Paint – a little less than a gallon
- 4 cabinet door hinges
- 2 cabinet door handles
- 2 magnetic cabinet door latches (or similar)
Construction
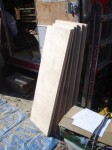
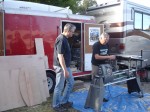
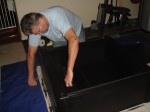
The first thing we did was to cut out all the plywood. For this, we used my father’s Shop Smith. He carries more cool tools in that red trailer than I have in my entire two car garage.
The top, with the rounded front, was first cut square and slightly wider than needed using the table saw. Then, we drew a 42½ inch radius arc on one side, and cut it out with a band saw attachment. We used a sanding pad attachment to sand the arc to a perfect curve. Later, we rounded the edge of the top with a router. The front and sides are rounded. The back is still straight, since it aligns with the back.
Cut the two cabinet doors a little smaller than I indicated to allow for clearance and paint / finish. I forgot, and we wound up cutting those three times.
We used the 2×4 in two locations. A 34 inch long piece is left full size, and used as a bracing for the front of the aquarium above the knickknacks shelf. The rest of the 2×4’s are ripped to 1¾ inches tall, so that when you screw them into the ¾ inch plywood bottom it’s exactly 2½ inches tall – the same as the molding we picked out for the bottom.
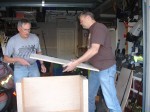
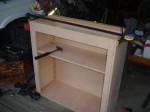
We choose to join all the plywood surfaces using batons butted up against the corners. The batons are just scrap wood that are about ¾ inch by 1 inch, cut to the length of the corner. We glued each surface with carpenter’s glue, and added wood screws about every 5 inches. All of the screw holes were pre-drilled to make sure we didn’t split the batons. If you have a biscuit joiner you could probably use that instead of the batons.
When you’re fitting pieces together, don’t forget about the middle shelf. You can easily forget about it, and leave yourself a tough time forcing it in place. When we glued pieces together we went in the following order:
- Right side to the back
- Left side to the back
- Middle shelf to the back and sides
- Right vertical fascia to the right side and middle shelf
- Left vertical fascia to the left side and middle shelf
- Bottom (turn it upside down to glue on the bottom)
- The ripped 2×4 pieces to the bottom plywood
- Horizontal fascia and the 2×4 support at the same time (turn it back over!)
- Top (we turned it back over to dry, thinking the weight of the cabinet would keep pressure on the joint)
The only joint we didn’t use batons on was the bottom back corner. This is because I only gave myself a ¼ inch clearance to fit a standard 20 gallon aquarium inside. If I had an extra inch I may have added that last baton in.
Clamp and let joints dry before going on to the next part. Remember, this thing has to support 600 – 700 lbs for the next 15 to 20 years.
Finishing
After we finished the main structure of the aquarium cabinet, we mounted the doors. Use a couple of pieces of thin cardboard under the doors to make sure you have enough clearance. In our case, the doors were just a little bit too high – twice. Adding the cabinet door knobs now would probably be a good choice. In my case, the door knobs still aren’t on. I’m still trying to decide if I want door knobs or not.
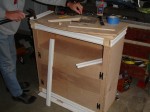
We started adding the molding after the doors were installed. We applied most of the moldings with just finishing nails. The exception is the bottom moldings, which are both glued and nailed. I glued the bottom moldings so that they won’t pop off as the aquarium settles into the carpet over time.
We used 4 kinds of molding. First, we used a 2½ inch wide, more or less flat, chair molding vertically on both sides of the doors. Second, the bottom is a 2½ inch wide floor molding that’s a little wider at the bottom than the top. We flipped that same molding over and put it on the top as well. Third, we added about an inch tall rounded molding above the 2½ inch molding on the top. Forth, to make it extra complicated, we added a half round rope-like wood molding over the top of the first two moldings. To finish it off, we added 4 square accent moldings at the top and bottom of the front, next to the cabinet doors.
You should have seen us at the local hardware warehouse store going back and forth, debating which molding was the perfect one for this spot or that spot. We must have tripped half a dozen people as we laid out molding on the floor to see how they looked together.
We had to put the hinges on before we put the side moldings on. None of the decorative cabinet hinges would work right, the way I designed the doors. Most of the hinges they had at the hardware store were the hidden style, and wouldn’t work with two pieces of plywood straight across. So, we had to use a rotary grinding tool to cut out room on the back side of the chair molding. Otherwise, the molding would not have laid flush over the top of the flat hinges.
We used my father’s chop saw to cut the molding. We even cut the inside 45 degree angles and glued the corners in like the pros do. Let me tell you, cutting that half round rope at a 45 degree angle and trying to get it to match the other corner is a pain. It looks nice, but I think I’ll avoid that stuff next time.
Almost as an after-thought, we added some of the rope molding to the top of the cabinet doors. It looks nice, and almost serves as a door handle. That’s why I haven’t decided if I’m going to put regular door handles on or not.
I used wood putty to fill in a few spots. Specifically, the finishing nails were all counter sunk, and I put filler on top of the small holes. There were a couple of holes in the sides of the plywood that were visible, that I also filled in. There were very few holes, though, since I had used hardwood plywood.
Next, I took a palm sander and sanded everything. I spent extra time where I had used the wood putty. I had to sand the molding by hand so that I didn’t flatten any of the curves.
The last step was painting. We painted the aquarium stand with a kettle black semi-gloss paint. We put on three coats. The molding was tough to paint, with all the groves in the wood rope molding. Mrs. Salty Geek and my son Patrick helped a lot with the painting.
Conclusion
The new aquarium stand is finished now. It is very sturdy. I think it would support twice the weight that will be going on it. The used 20 gallon aquarium I bought fits inside perfectly. It’s black. It’s nice looking – even Mrs. Salty Geek agrees. And, it doesn’t have any cinder blocks. I have to say it’s a success.
The next step is to wait until the paint is thoroughly dry. It’s taking a ridiculously long time to dry. Even 8 days after we applied the last coat, the paint still feels a little tacky.
I’ll post again when I move the aquarium from one stand to the other. That should be interesting…
VERY nice – – I am sure Mrs. Salty Geek is very releived that not even one cinderblock came near……
Yes you are right, no cinder blocks, could not be ugly, needs to look like part of the house furniture. Oh and did i say no cinder blocks, he kept trying but i was not having a red neck fishstand like my grandparents did 🙂
[…] project started at Christmas time, 2009. This link will take you to Glen’s, “Salty Geek” blog for commentary on the construction […]